Our first stripe is FINALLY here!
Where I am from, in the Midwest, we can pretty well count on January temperatures being cold, sometimes with long stretches of below zero temperatures. So, you can imagine my surprise when January 2019 started off with unseasonably warm temperatures (up to the 60s some days) and then drifted down to below zero highs, and dipped even lower in the last few days to historic lows of -20 actual — and -50 with the wind chill. Ah yes, the Midwest. We have it all!
I always laugh at the never-ending-month-of-January memes and jokes, because January here just ISN’T pleasant (weather-wise). But my family did have some pleasantness this January. We spent time with family, we went on a trip to New York to see MORE family, my oldest got to experience her first true winter break from school, AND a whole bunch of snow days. I hope as you are stitching away at this inaugural Temperature Blanket stripe, you are reminded of all the pleasantness that January had to offer!
Design Inspiration:
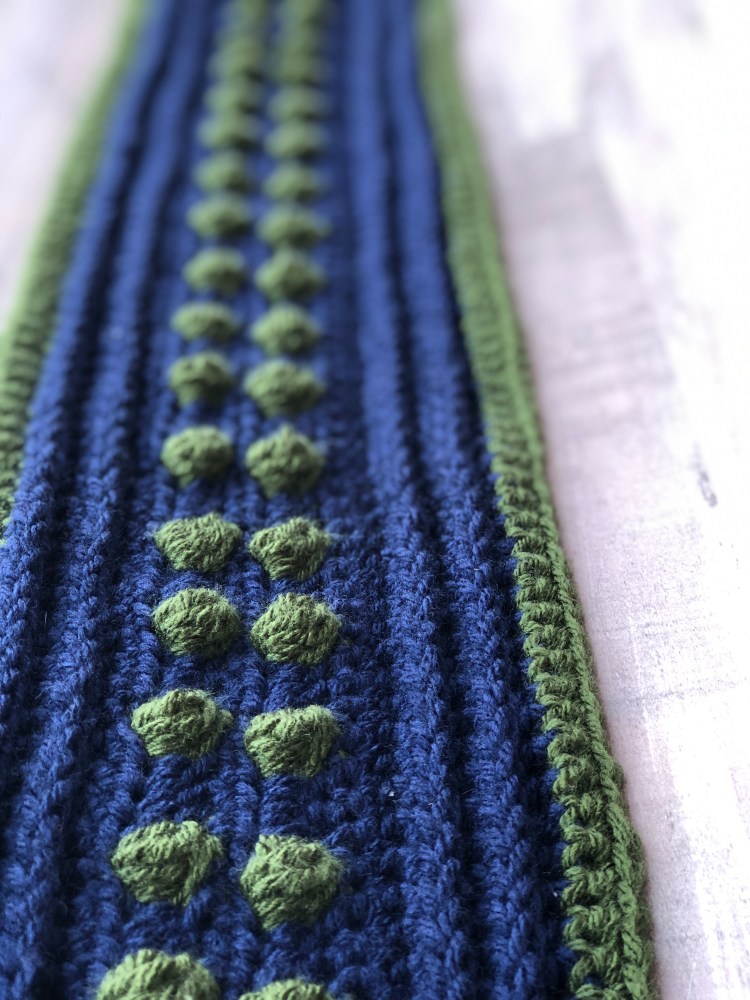
The design below is inspired by the textures that I fell in love with when diving into learning more about crochet. I remember the first time I stitched a bobble, I could hardly believe yarn could be manipulated that way. I’m all about the simple pleasures in stitching and the whimsical properties that yarn can take with just a little extra love and attention.
I hope you are able to stitch your January highs and lows away and enjoy the simple but fun texture of this stripe.
Materials:
Two Skeins of Hobby Lobby’s I Love this Yarn in your average high and low colors (determined by your chart)
Total yardage for the stripe is roughly 335 yds
237 yds of High Color
98 yds of Low color
Tapestry Needle: I love these Bates needles that are SO great for weaving in short ends. I promise if you try these, you won’t want to use any others!
Abbreviations:
SC: Single Crochet
CH: Chain
HDC: Half Double Crochet
HDC into the Third Loop (Back):Half Double Crochet into the Third loop. If you’ve not done this technique, Moogly Blog has a great tutorial
B: Bobble — Stitch explanation below
Important Notes:
- There are lots of ways to carry these colors to hide yarn ends as you go. I’ve added a tutorial video below (and to my IG TV) to show you just how I like to approach making each of these bobbles so that the color change is concealed. (Please visit www.instagram.com/TeaganandLu to view it on IG)
- You will break the yarn of the contrasting color (the low temp) at the end of each bobble stitch row where it appears.
- CH1 at the beginning of new rows does not count as a stitch.
- CH2 at the beginning of new rows typically DOES count as a stitch, unless otherwise noted.
- Gauge for a 4 x 4 in SC is 13 stitches and 16 rows.
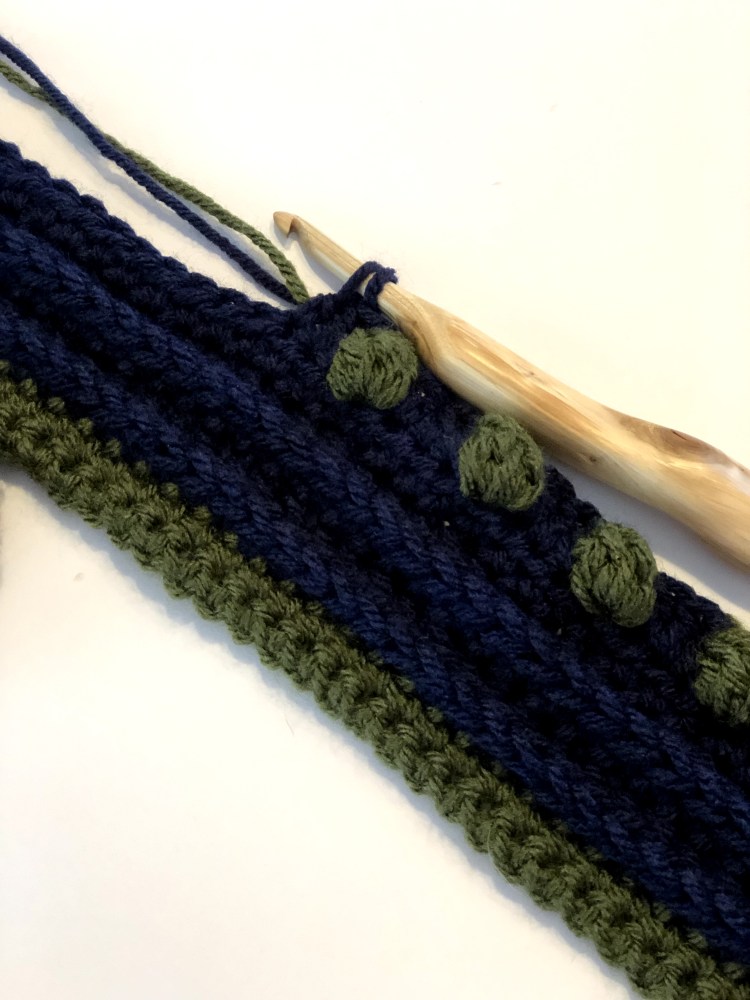
The Bobbles and Color Changes: A Tutorial
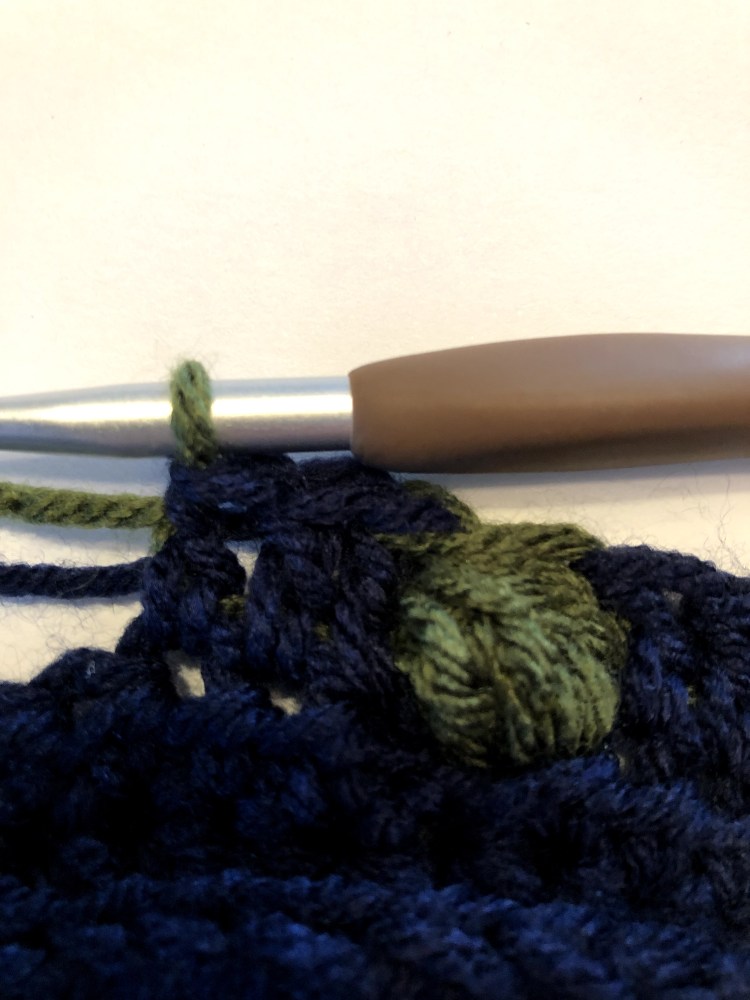
*In the following photos the HIGH TEMP is represented in the Navy Blue color and the LOW in the Light Green color*
In this pattern, a BOBBLE is formed by the following steps:
- Using the LOW TEMPERATURE COLOR, *YO, pull up a loop, YO, draw through two loops* repeat four more times (there will be six loops on the hook).
- YO using BOTH colors (held together).


Color Changes are best made using the following steps:
- Change from HIGH TEMP color to LOW COLOR on the last step of a DC
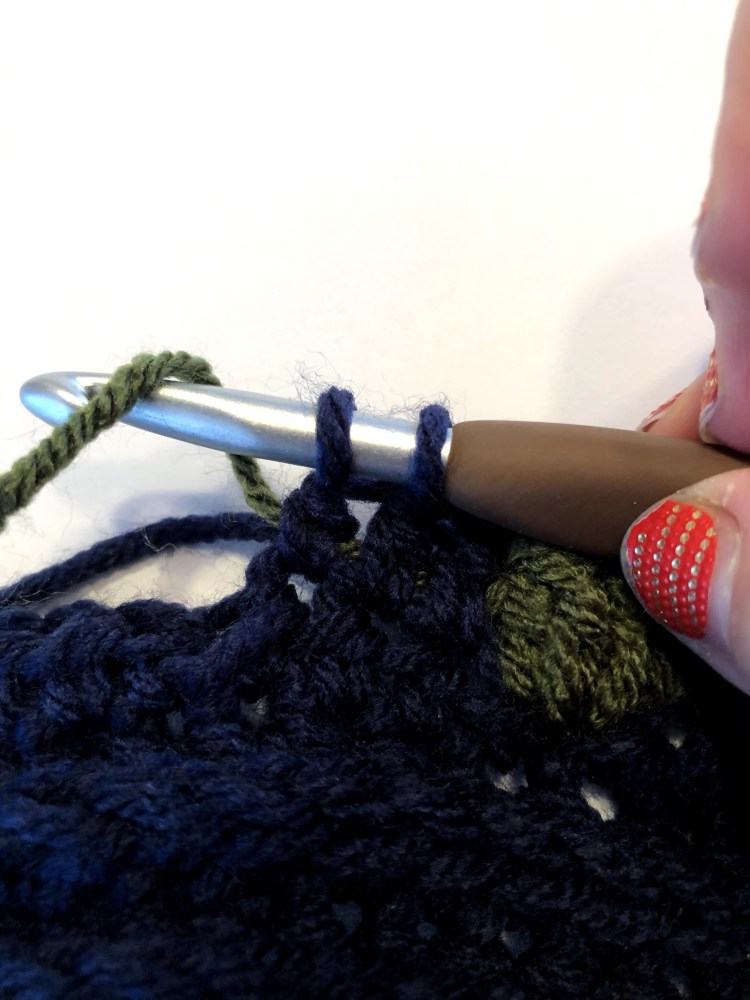
- Bobble in LOW COLOR while working OVER the HIGH TEMP color to conceal it.
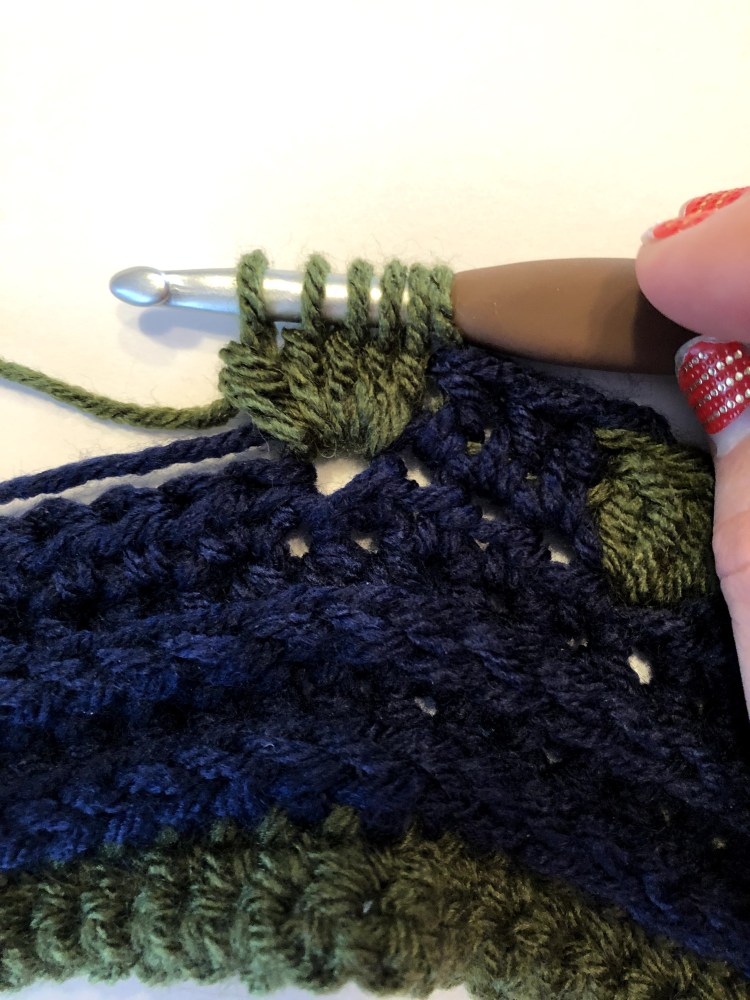
- On the last step of the bobble, pull through all loops on the hook with BOTH colors.
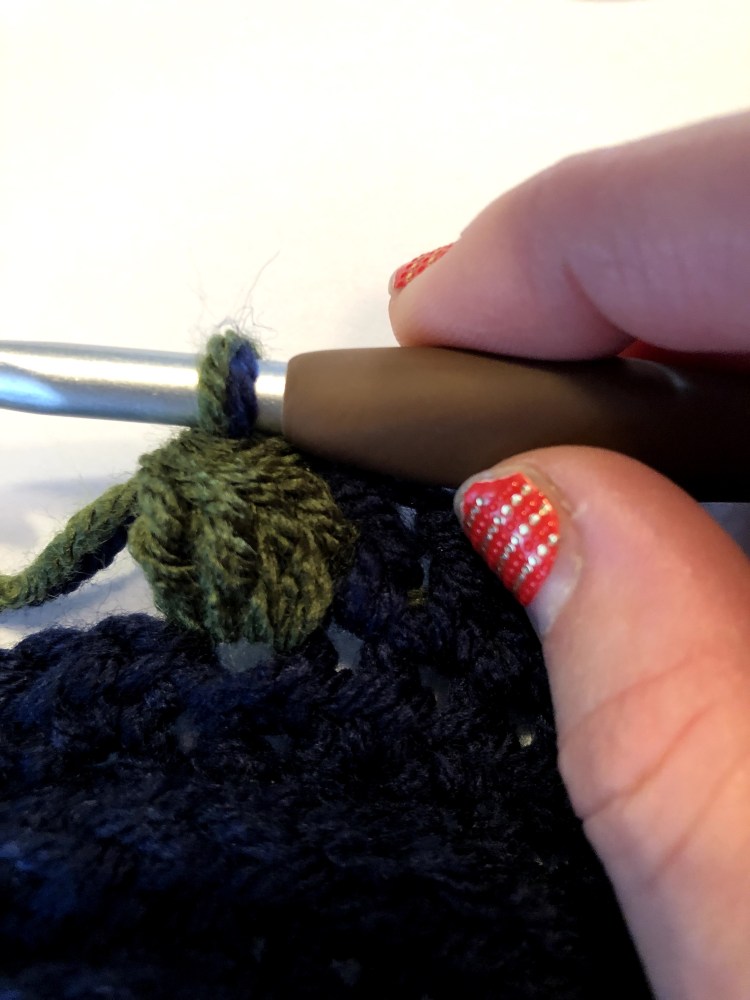
- For Remaining DC stitches, work OVER the LOW TEMP color.
Video Tutorial:
Pattern
Begin by Chaining 181 in the Low Temp color. (All rows should contain 180 sts as a final stitch count.)
*You may also choose to use FDSC instead (180 sts)
Row 1: Working into the 2nd CH from hook, SC in the Low Temperature Color. Ch 1 Turn. (180 sts)
Row 2: SC across in Low Temperature color, switching to High Temp on the turning chain, CH 2 and Turn. (180 sts)
Row 3: HDC across (CH 2 turning chain DOES count as a stitch), CH 2 and Turn.
Row 4: Continuing in High Temperature, HDC in third loop across. CH2 and Turn.
Row 5: (Continuing in High Temperature) HDC Across, CH 2 and Turn.
Row 6: (Continuing in High Temperature) HDC in the third loop across. CH2 and Turn.
Row 7: (Continuing in High Temperature) HDC across, CH 2 (counts as a DC) and turn.
(See color change tutorial for rows 8-10)
Row 8: DC 2 in High Temp Color, *Bobble in Low Temp color, DC 3 in High Temp Color, * repeat ** to end(ending in 1DC). CH1 and Turn.
Row 9: HDC across in High Temp Color. CH2 (Counts as a DC) and Turn.
Row 10: *Bobble in Low Temp Color, DC 3* Repeat ** across ending with 2 DC. CH1 And Turn
Row 11: In High Temp Color, SC across. CH2 and turn.
Row 12: HDC across in High Temp color and turn.
Row 13:CH 1 HDC across in High Temp color and turn.
Row 14:CH 1 HDC across in Third Loop In High Temp color. Turn.
Row 15:CH 1 HDC across in High Temp color. Turn.
Row 16:CH 1 HDC across in Third Loop in High Temp Color, switch to Low Temp Color CH1 and turn.
Rows 17-18: SC across in Low Temp Color, *CH1 and Turn* Omit ** for final row.
Weave in your ends, and this stripe is complete!